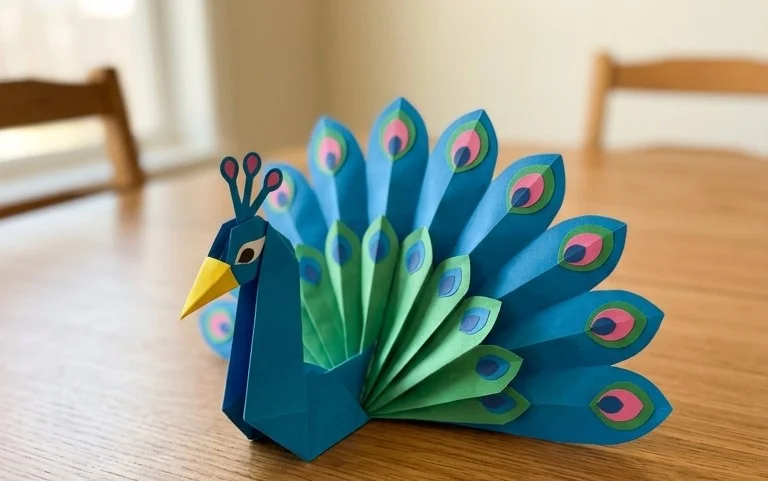
Easy Origami Sea Turtle: Step-by-Step Paper Craft
How to Fold an Origami Sea Turtle is a delightful project that will transport you to the ocean’s depths with its charming charm. Imagine a perfectly formed sea turtle, its shell textured and its flippers elegantly posed, ready to glide through imaginary waters. This beginner-friendly model is perfect for kids and adults alike, making it a wonderful craft for a rainy afternoon or a thoughtful handmade gift. In about 15-20 minutes, you’ll discover the magic of transforming a flat sheet of paper into this adorable creature. We’ll guide you step-by-step through simple folds and creases, showing you how to create the distinct shell shape and those iconic flippers. Get ready to dive into the wonderful world of origami and bring your very own paper sea turtle to life!
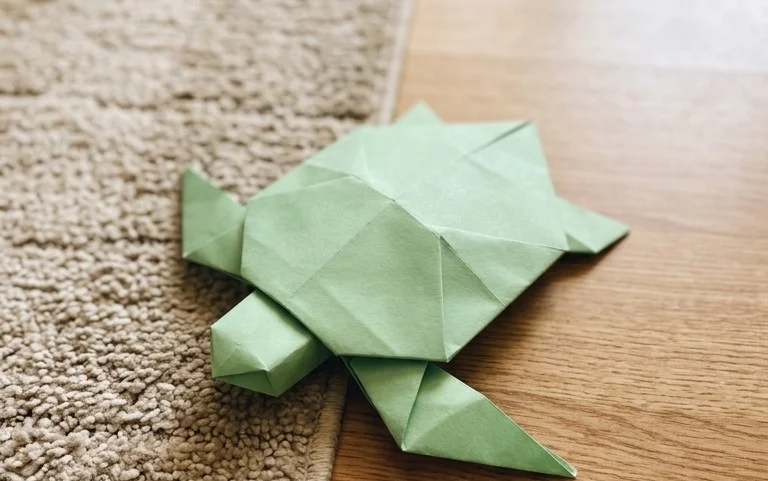
Creating Your Own Origami Sea Turtle: A Step-by-Step Guide
Hello, fellow origami enthusiasts! Today, we’re going to embark on a calming and rewarding journey to fold an origami sea turtle. This model is a wonderful choice for beginners, offering a satisfying sense of accomplishment without being overly complex. We’ll go through each step together, ensuring you can create a beautiful turtle that looks like it’s ready to swim off the page.
Choosing Your Paper: The Foundation of Your Turtle
The paper you choose can make a big difference in the look and feel of your origami sea turtle. For this model, I recommend starting with standard origami paper.
Type: Origami paper, also known as kami, is perfect. It’s specifically designed for folding, meaning it’s strong enough to hold creases well but also thin enough to allow for multiple layers without becoming too bulky. You can also use printer paper in a pinch, but it will be stiffer and might be a little trickier to get crisp folds.
Weight: Standard origami paper is usually around 70-80 gsm (grams per square meter). This is a good weight – not too flimsy, not too thick.
Size: For your first turtle, I suggest starting with a square piece of paper that’s 6 inches (15 cm) by 6 inches (15 cm). This size is manageable and allows for precise folds. Once you’re comfortable, you can experiment with larger or smaller sizes.
Single or Double Sided: This is where you can have fun with design! You can use paper that is the same color on both sides, or you can use paper that is a different color on each side. For a sea turtle, using a green or blue paper on one side and white or a lighter shade of green/blue on the other can create a lovely effect, mimicking the shell and the underside. Alternatively, a patterned paper can add unique character to your turtle.
The Essential Bases: Building Blocks for Your Turtle
Before we dive into the specific folds for our sea turtle, let’s familiarize ourselves with a couple of fundamental origami bases that we’ll utilize. Mastering these will make the rest of the process much smoother.
The Square Base (or Preliminary Base):
This is a very common starting point for many origami models.
1. Start with your square piece of paper, colored side up if you have one.
2. Fold the paper in half horizontally, bringing the bottom edge up to meet the top edge. Crease firmly.
3. Unfold.
4. Now, fold the paper in half vertically, bringing the left edge to meet the right edge. Crease firmly.
5. Unfold.
You should now have your paper divided into four quadrants by creases.
6. Flip the paper over so the white side is facing up.
7. Fold the paper in half diagonally, bringing the bottom right corner up to meet the top left corner. Crease firmly.
8. Unfold.
9. Fold the paper in half diagonally again, this time bringing the bottom left corner up to meet the top right corner. Crease firmly.
10. Unfold.
You now have a grid of creases on your paper.
11. Now, with the white side still facing up, gently push the left and right edges inwards towards the center along the vertical creases. As you do this, the top and bottom points will naturally start to come together.
12. Flatten the paper down. You should end up with a smaller square, with four flaps meeting at a point at the top. This is your Square Base. Make sure all the creases are sharp and clean.
The Bird Base:
This base is also used in many traditional origami models, and it’s what will form the main body and limbs of our turtle.
1. Take your Square Base and orient it so that the open flaps are facing away from you.
2. Take the top layer of the right flap and fold its bottom edge inwards to meet the center vertical crease. Crease firmly.
3. Repeat this with the top layer of the left flap, folding its bottom edge inwards to meet the center vertical crease. Crease firmly.
4. You should now have a kite shape on the top layer.
5. Flip the entire model over.
6. Repeat steps 2 and 3 on this side: fold the bottom edge of the right flap inwards to the center crease, and then the bottom edge of the left flap inwards to the center crease. Crease firmly.
7. Now, take the top triangular flap that you just folded down on one side and fold it upwards, creasing along the top edge of the two flaps you just folded in. This crease should align with the top point of the model.
8. Flip the model over and repeat step 7 on the other side.
9. You now have a shape that looks a bit like an ice cream cone with two pointed flaps sticking out on either side.
10. Take the top layer of the right flap (the one that looks like an ice cream cone scoop) and fold it downwards along the horizontal crease you just made in step 7.
11. Flip the model over and repeat step 10 on the other side.
12. Now, look at the two pointy “legs” sticking out on the bottom. Take the top layer of the right leg and fold it upwards and outwards at an angle. This will form one of the turtle’s flippers. Aim for a fold that is roughly 45 degrees. Crease firmly.
13. Repeat step 12 with the top layer of the left leg, folding it upwards and outwards at a similar angle. Crease firmly.
14. Flip the model over and repeat steps 12 and 13 on the other side. You should now have four flaps sticking out, which will become the turtle’s flippers.
15. Now, we need to refine the “head” area. Look at the pointy top part of the model. Take the very tip of the top layer and fold it downwards slightly. This will begin to shape the turtle’s head. Crease.
16. Flip the model over and repeat step 15 on the other side.
This is your Bird Base, and it’s a fantastic foundation for many models, including our sea turtle!
Your Sea Turtle Fold Sequence: A Step-by-Step Journey
Now that we’re comfortable with the Square and Bird Bases, let’s get folding our sea turtle.
1. Start with your paper. If you’re using a double-sided paper and want the shell to be a specific color, place the colored side down for the initial Square Base fold. For the Bird Base, we’ll ensure the colored side ends up on the outside.
2. Fold the Square Base as described above.
3. Flip the Square Base over so the colored side is facing up.
4. Fold the Bird Base as described above. You should now have a shape with four flaps at the bottom (the flippers) and a point at the top (which will become the head and tail).
5. Let’s start shaping the head and tail. Orient the Bird Base so the open flaps (flippers) are pointing downwards.
6. Take the top layer of the right “leg” (which is now one of the flippers) and fold it upwards and outwards at an angle. This will become a front flipper. The angle you choose will determine how extended your flippers are. Aim for a gentle outward angle. Crease firmly.
7. Repeat step 6 with the top layer of the left “leg” on the same side. Crease firmly.
8. Flip the entire model over.
9. Repeat steps 6 and 7 on this side to create the other two front flippers. You should now have four flippers extending outwards.
10. Now, let’s form the head and tail. Look at the pointy tip at the top of the model. We need to make a head and a tail from this.
11. Take the very tip of the top layer of the point and fold it downwards a small amount. This will create the start of the head. Crease firmly.
12. Now, we’ll create the tail. Look at the opposite end of the model, where the point is. We’re going to bring this point upwards to create the tail. Take the entire point at the bottom and fold it upwards, so it sits between the two “legs” you’ve just folded out as flippers. The exact angle here is up to you; a gentle upward curve looks natural. Crease firmly.
13. Flip the entire model over.
14. You should see a similar pointed area at the bottom. We’ll perform an inside-reverse fold to create the head and tail more distinctly.
15. Look at the point that will become the head. Gently open up the layers slightly where you made the first head fold. Push the tip inwards and then fold it down again, tucking it inside the layers. This is an inside-reverse fold. Flatten the paper to make this crease sharp. This makes the head appear more defined and tucked in.
16. Now, look at the point that will become the tail. We’ll do a similar inside-reverse fold. Gently open up the layers at the tail point. Push the tip inwards and then fold it back on itself, tucking it inside the layers. Flatten to crease. This creates a neat, defined tail.
17. The last step is to give your turtle a bit of dimension. Gently pull the flippers outwards slightly, so they are not flat against the body. You can also gently shape the shell by slightly curving the top.
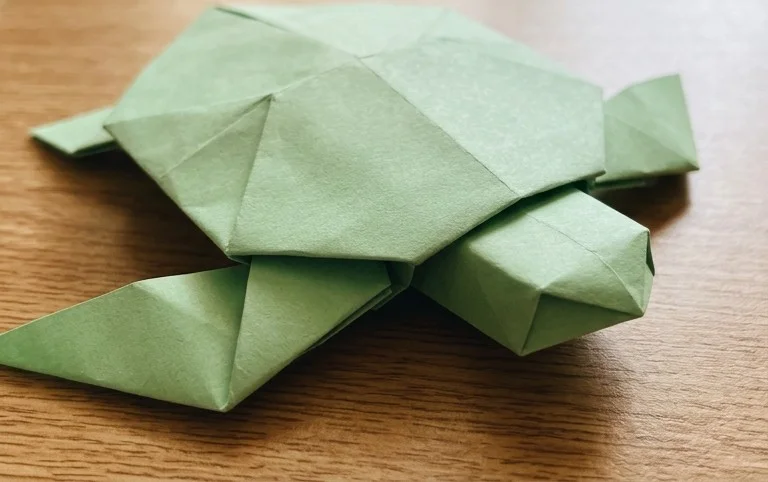
Congratulations, you’ve folded an origami sea turtle!
Common Pitfalls and How to Avoid Them
Even experienced folders make mistakes, and it’s completely normal! Here are a couple of places beginners often stumble with this model, and how to steer clear of them:
* **Not Creasing Firmly Enough:** Origami relies on crisp, clean creases. If your folds are too soft, the paper can become baggy, and the model will lose its shape.
* **How to Avoid:** After each fold, run your fingernail along the crease line. This will make the crease sharp and permanent. When you’re folding the Square Base and Bird Base, really press down to ensure every line is well-defined.
* **Misaligning Corners and Edges:** This is especially crucial in the early base folds. Even a millimeter off can lead to a wonky final model.
* **How to Avoid:** Take your time. When bringing a corner to meet an edge, physically line up the points and edges before making the crease. Don’t rush. For the Bird Base, ensure the edges you’re folding to the center line are perfectly aligned with that center crease.
* **The Inside-Reverse Fold:** This fold can be a little tricky for beginners. If not done carefully, it can result in a messy head or tail.
* **How to Avoid:** Don’t be afraid to gently open up the paper a little to guide the fold. Visualize where the paper needs to go *inside* the layers. It’s a bit like tucking something away. Press firmly once you’ve guided the paper into its new position. Practice this fold on scrap paper if you’re unsure.
Personalizing Your Turtle: Variations to Explore
Once you’ve mastered the basic sea turtle, you can have a lot of fun with variations!
* **Size:** As mentioned, using larger or smaller square paper will result in a larger or smaller turtle. Smaller turtles are great for embellishing a card or a gift tag, while larger ones make a statement on their own.
* **Paper Pattern:** The sky’s the limit!
* **Traditional Patterns:** Try using paper with traditional Japanese patterns for an elegant touch.
* **Themed Paper:** For a child’s room, consider paper with a nautical theme, or even a fun polka dot.
* **Textured Paper:** Some origami papers have a slight texture, which can add depth to the turtle’s shell.
* **Color Combinations:**
* **Oceanic Tones:** Greens, blues, and teals are classic for a reason. You can also try sandy beiges or even purples for a more whimsical turtle.
* **Surprise Interiors:** Using paper with a bright, contrasting color on the inside can be a fun surprise when you look at the underside of the flippers or the shell.
* **Adding Detail:** Once folded, you can use fine-tip markers to draw eyes, subtle markings on the shell, or even a little mouth.
Displaying and Gifting Your Origami Sea Turtle
Your beautiful origami sea turtle deserves to be admired!
* **Desk Buddy:** Place your turtle on your desk as a calming presence and a reminder of your crafting skills.
* **Shelf Decor:** Arrange a few turtles of different sizes and colors on a bookshelf or a mantelpiece for a charming display.
* **Mobile:** String several turtles together to create a delightful ocean-themed mobile for a child’s room or nursery.
* **Gift Embellishment:** Attach a turtle to the top of a gift box or a greeting card for a unique and personal touch. It’s especially lovely for birthday cards or messages for someone who loves the ocean.
* **Party Favors:** For a beach-themed party, a small origami sea turtle can make a memorable and eco-friendly party favor.
* **Dioramas and Scenes:** Incorporate your turtles into larger origami scenes or dioramas depicting underwater life.
Folding an origami sea turtle is more than just a craft; it’s a mindful activity that results in a lovely little creature. I hope you’ve enjoyed this tutorial and are proud of the turtle you’ve created. Happy folding!
Conclusion
Congratulations on folding your very own origami sea turtle! We hope you enjoyed this papercraft adventure. Don’t worry if your first sea turtle isn’t perfect – every fold is a learning experience, and practice makes masterful! Feel free to share your wonderful creation with friends and family. For your next challenge, try folding a flapping bird or a traditional crane. We encourage you to keep exploring the magical world of origami and discover even more delightful paper projects to bring to life!