Easy Origami Lucky Star: Step-by-Step Paper Craft
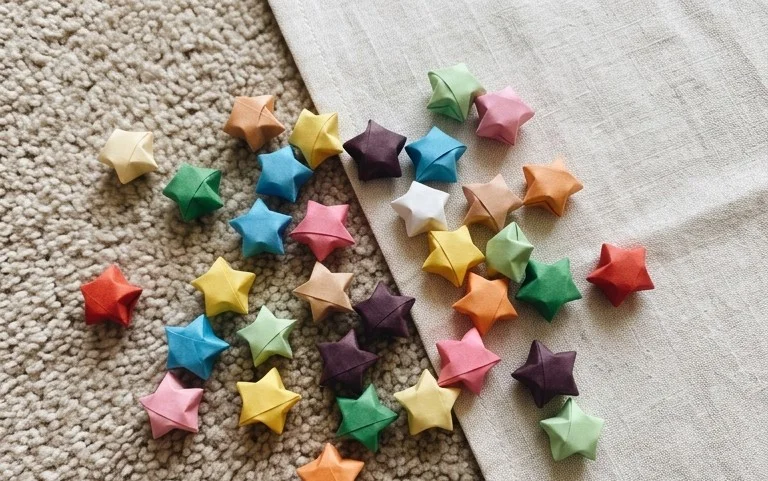
Origami Lucky Star tutorials are a wonderful way to bring a little magic into your day! These charming little stars, often made from strips of paper, are incredibly satisfying to create. Imagine a tiny, three-dimensional star, plump and perfectly formed, ready to be strung up as a garland, tucked into a wish jar, or even gifted as a symbol of good luck. This project is absolutely perfect for complete beginners, as well as fantastic for kids looking for a fun and focused activity. You’ll be amazed at how quickly you can fold a whole handful – often in just a few minutes per star! Throughout this tutorial, I’ll guide you, step-by-step, through the simple folds and turns required to transform a humble strip of paper into one of these delightful lucky stars. Let’s get folding!
Origami Lucky Star: Step-by-Step Instructions
Welcome to the wonderful world of origami! Today, we’re going to learn how to fold a simple yet charming origami lucky star. These tiny stars are surprisingly easy to make and are perfect for decorating, gifting, or just for fun. They’re a wonderful way to practice basic folds and create something beautiful with just a piece of paper. I’ll guide you through each step patiently, so don’t worry if you’re new to origami. We’ll take our time and make sure every fold is clear and precise.
Choosing Your Paper
The first step in any origami project is choosing the right paper. For our lucky star, you have a few options.
Paper Type and Weight
The most common paper for origami is called “kami” paper. This is a thin, crisp paper specifically designed for folding. It holds creases well and is easy to work with. If you don’t have dedicated origami paper, printer paper will work in a pinch, but it can be a bit thicker and harder to get very sharp creases. Avoid cardstock or very thick paper, as it will be difficult to fold accurately, especially for the later steps of the star. A good weight for beginners is around 70-90 gsm (grams per square meter).
Paper Size
For your first few lucky stars, I recommend starting with strips of paper that are about 1 cm (or a little less than half an inch) wide and 29 cm (about 11.5 inches) long. This is a standard size for many origami star patterns. You can cut these strips from larger sheets of paper. A standard A4 or letter-sized sheet can be cut into multiple strips.
Single or Double-Sided Paper
You can use either single-sided or double-sided paper. If you use single-sided paper (one colour on one side, white on the other), your stars will have one coloured side and one white side. If you use double-sided paper, you’ll have colour on both sides, which can create a lovely effect. For a classic look, I often use single-sided paper with a bright colour on the front and white on the back. This allows the structure of the star to be a bit more visible.
The Base Folds: Getting Started
Before we begin the step-by-step folding sequence for the star itself, we’ll create a simple base structure. This involves a few basic folds that are fundamental to many origami models.
Creating the Knot Base
1. Start with your paper strip. If you’re using single-sided paper, hold it so the coloured side is facing down and the white side is facing up.
2. Take one end of the strip and bring it over to meet the other end, forming a loop. Don’t worry about making it perfectly tight yet.
3. Now, take the loose end of the strip that’s sticking out from the loop and tuck it through the loop. You’ll want to create a knot, but not a super tight one. Gently pull the ends to flatten the knot into a pentagon shape.
4. You should now have a flat pentagon with one short tail sticking out. Flatten this pentagon as much as you can. Press down firmly on all the edges to make them crisp. This is your basic pentagon base for the star.
Making Your Folds Cleanly
The key to beautiful origami is making clean, crisp folds. Here’s how to achieve that:
* **Align Carefully:** Before making any fold, take a moment to align the edges and corners perfectly. Even a tiny misalignment can affect later steps.
* **Crease Firmly:** Once aligned, run your fingernail along the fold line. This will create a sharp crease. You can also use a bone folder if you have one, but a fingernail works perfectly well.
* **Unfold and Refold:** Sometimes, it’s helpful to make a crease, unfold the paper, and then refold along that same crease. This reinforces the line and makes it easier to work with.
* **Work on a Flat Surface:** Always fold on a hard, flat surface like a table or desk. This will help you achieve the sharpest creases.
Step-by-Step Folding Sequence
Now that we have our pentagon base, let’s turn it into a lucky star!
1. Take the short tail that’s sticking out from your pentagon. Fold this tail up and over one of the sides of the pentagon, so the tip of the tail touches the opposite vertex (corner) of the pentagon. Crease firmly.
2. Now, fold this same tail back down along the edge of the pentagon. You’ll be folding it so that the edge of the tail aligns with the edge of the pentagon it just went over. Crease again.
3. Tuck the tip of the tail into the pocket formed by the pentagon. You might need to gently lift a flap to tuck it in. This secures the knot and prevents it from unraveling.
4. Now, turn the pentagon over. You should see a slightly different shape on this side.
5. Take one of the points (vertices) of the pentagon and fold it inwards towards the center of the pentagon. Don’t fold it exactly to the center; instead, aim to bring the point about two-thirds of the way towards the center. Crease this fold.
6. Repeat step 5 for all five points of the pentagon. You will now have a shape that looks like a smaller, somewhat shrunken pentagon with five little points sticking out around its edges.
7. Now for the magic! Pick one of the small points that are sticking out. Gently push this point inwards with your finger. As you push it, the sides of the pentagon will start to puff out.
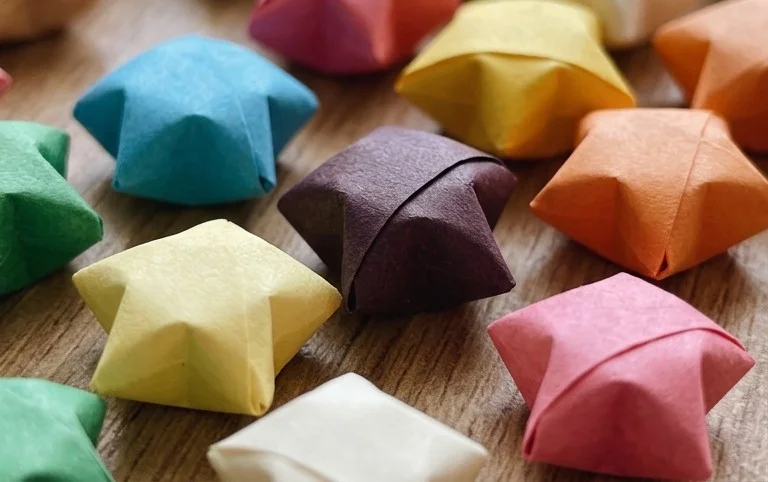
8. Continue to gently push and fold in all five of these small points. As you do this, the center of the shape will gradually inflate and form the characteristic puffed-up star shape. Don’t force it; just guide the paper.
9. Once all five points are tucked in, you have your lucky star! You can gently pinch and shape it to make it look rounder and more symmetrical.
Common Pitfalls for Beginners and How to Avoid Them
Even with clear instructions, it’s normal to encounter a few tricky spots when you’re learning. Here are some common places beginners go wrong and how to avoid them:
Pitfall 1: The Knot Base is Not a Clean Pentagon
* **What happens:** The initial knot doesn’t form a neat, flat pentagon, or it’s too loose and the tail doesn’t tuck in properly.
* **How to avoid it:** When you first form the loop and knot, don’t pull it too tight. Instead, gently manipulate the paper to form a pentagon shape. Flatten it very deliberately, pressing down on each edge to create sharp lines. The goal is a flat, five-sided figure before you start folding the tail. Make sure the tail tucks in snugly in step 3.
Pitfall 2: Uneven Folds in Step 5 and 6
* **What happens:** When folding in the points in steps 5 and 6, the folds are not consistent, leading to an lopsided star.
* **How to avoid it:** This is where precision is key. In step 5, make sure you fold each point in by roughly the same amount. Imagine a central point and try to bring each vertex about two-thirds of the way towards it. Consistency across all five points is crucial. In step 6, repeat this for all five points, making sure the angle and depth of the fold are as similar as possible for each point.
Pitfall 3: Over-Inflating or Damaging the Star
* **What happens:** When trying to puff up the star in step 7 and 8, you might push too hard and crease the delicate sides, or the star doesn’t puff up evenly.
* **How to avoid it:** Be gentle! The paper is still relatively thin here. Instead of forceful pushing, use a gentle, consistent pressure. You can use your thumb and index finger to cup the sides of the pentagon and gently encourage it to puff outwards. If one side seems resistant, try gently coaxing it rather than forcing it. You can also gently roll the star between your palms to even out the puffiness.
Varying Your Lucky Stars
Once you’ve mastered the basic lucky star, you can have a lot of fun experimenting!
Size Variations
To make larger stars, start with longer and slightly wider strips of paper. To make smaller stars, use shorter and narrower strips. The ratio of length to width will largely determine how the final star looks, but for the classic star shape, keeping the width about 1/15th to 1/20th of the length is a good starting point.
Paper Patterns and Colours
This is where you can really get creative!
* **Patterned Paper:** Origami paper often comes with beautiful patterns. Using patterned paper will give your stars a unique and vibrant look. Think about floral patterns, geometric designs, or even holiday-themed papers.
* **Solid Colours:** A collection of stars in different solid colours can create a stunning display. You can also use different shades of the same colour for a monochromatic effect.
* **Double-Sided Paper:** As mentioned earlier, double-sided paper offers another layer of design possibility, with different colours or patterns appearing on different parts of the star.
* **Metallic or Glitter Paper:** For a touch of sparkle, try using metallic or glitter origami paper. These can make your stars look extra special, perfect for celebrations.
Displaying and Gifting Your Lucky Stars
Origami lucky stars are incredibly versatile. Here are some ideas for what to do with your creations:
Display Ideas
* **Bowl of Stars:** Fill a clear glass bowl or jar with your completed stars for a colourful and cheerful decoration.
* **Garland:** String your stars together with thread or fishing line to create a beautiful garland for your window, wall, or Christmas tree.
* **Mobile:** Attach stars to a mobile structure for a charming baby mobile or a decorative piece.
* **Table Scatter:** Sprinkle them on a party table for a festive touch.
Gifting Ideas
* **In a Card:** Tuck a few stars inside a greeting card for a personal and handmade surprise.
* **As a Bookmark:** A single star can make a unique and decorative bookmark.
* **Gift Topper:** Tie a star to the ribbon of a gift for an extra special presentation.
* **Lucky Charm:** Give them as good luck charms to friends or family, especially before exams, interviews, or trips.
* **Party Favors:** Fill small bags with a few stars as party favors for guests.
I hope you’ve enjoyed folding your first origami lucky star! Don’t be discouraged if your first few aren’t perfect. The more you practice, the better you’ll become, and the more joy you’ll find in creating these little paper treasures. Happy folding!
Conclusion
Congratulations on creating your very own origami lucky star! Don’t worry if your first attempt isn’t perfect – every folded piece of paper is a learning experience, and practice truly makes perfect. We hope you feel a sense of accomplishment with your beautiful creation. Feel free to share your completed origami lucky star with friends and family; they’ll surely be impressed!
Once you’ve mastered this design, why not try a different paper folding project? Perhaps you’d like to fold a classic crane next, or maybe explore the intricate world of modular origami. The possibilities are endless!
We invite you to continue your paper crafting journey and explore more exciting origami projects with us. Happy folding!