Easy Origami Box with Lid: Step-by-Step Paper Craft
Easy and quick origami box (with lid) to the rescue! Have you ever wished you had a charming little container for tiny treasures, craft supplies, or even a sweet homemade gift? Well, get ready to fold one yourself! In just a few minutes, we’ll create a perfectly proportioned box with a matching lid, ideal for holding everything from paperclips to earrings. This project is absolutely perfect for complete beginners and kids, and it takes about 5-10 minutes to complete, making it a fantastic last-minute gift embellishment or a cute desk decoration. We’ll walk through each step together, focusing on simple folds and clear instructions, so you can build your confidence and create something beautiful with your own hands. Let’s grab some paper and start folding!
Crafting Your First Origami Box: A Simple Yet Satisfying Project
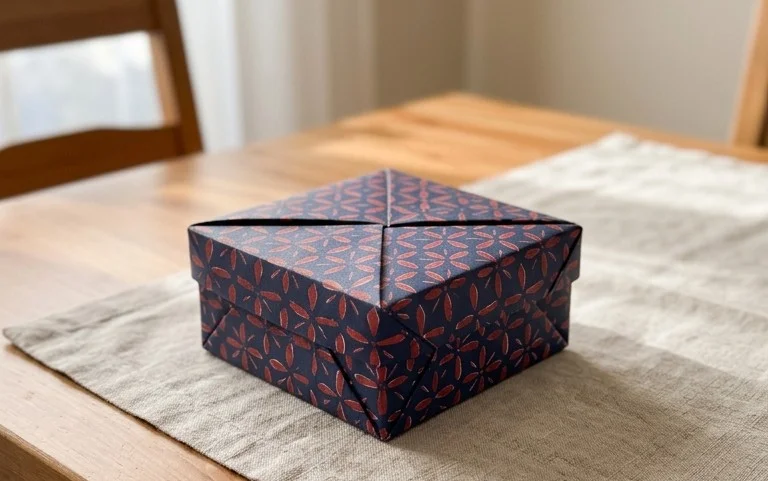
Welcome to the wonderful world of origami! Today, we’re going to create something incredibly useful and surprisingly easy: an origami box with a lid. This is a fantastic project for beginners, as it involves straightforward folds that quickly come together to form a neat and functional container. Imagine having a place to store small treasures, a beautiful gift box for a handmade present, or even just a charming way to organize your desk. We’ll go through every step together, making sure you feel confident and successful.
Choosing Your Paper: The Foundation of a Great Box
The paper you choose is more important than you might think, and for this simple box, it’s a key factor in how easily you can fold and how good your finished product looks.
Type of Paper:
For this project, I recommend starting with standard origami paper. This paper is specifically designed for folding: it’s thin enough to allow for crisp folds, yet strong enough to hold its shape. It’s usually square, which is perfect for origami. If you don’t have origami paper, regular printer paper can work in a pinch, but it will be a bit thicker and may result in bulkier folds, especially at the corners. Avoid cardstock or very thick paper for your first attempt, as it can be challenging to fold precisely.
Weight:
Origami paper typically comes in weights around 60-80 gsm (grams per square meter). This is a good medium weight that balances durability with foldability. Thinner paper might tear easily, while much heavier paper can be difficult to manage.
Size:
For a beginner-friendly box, I recommend starting with a square piece of paper that’s at least 15cm x 15cm (about 6 inches x 6 inches). Larger paper is easier to handle and makes the folds more forgiving. Once you’re comfortable, you can experiment with smaller sizes. We’ll be making a box and a lid from two separate pieces of paper, so you’ll need two squares of the same size.
Single or Double-Sided:
This is where you can get creative! For a clean, uniform look, single-sided origami paper (white on one side, coloured on the other) is excellent. When you fold, the coloured side will be visible on the outside of your box and lid. If you want a more subtle or textured look, you can use double-sided paper where both sides are the same colour, or even paper with a patterned design on one side and a solid colour on the other. For your very first box, I suggest using single-sided paper with the coloured side facing up when you begin.
Mastering the Base Folds: Precision is Key
Before we dive into the step-by-step instructions, let’s talk about a couple of fundamental folds that are crucial for making your box neat and sturdy.
Valley Folds:
A valley fold is the most common type of fold. Imagine making a tiny valley in a piece of paper. You’re essentially folding the paper towards you, creating a crease that dips inwards. To make a clean valley fold, align the edges or corners perfectly, then run your fingernail firmly along the crease line, from one end to the other. The sharper the crease, the better your origami will hold its shape.
Mountain Folds:
A mountain fold is the opposite of a valley fold. Instead of folding towards you, you fold the paper away from you, creating a crease that stands up like a mountain ridge. Again, precision in alignment is key. When making a mountain fold, you’ll often be folding along a line that was previously created by a valley fold.
The Folding Sequence: Creating Your Origami Box Step-by-Step
Let’s start with the base of the box. Remember, we need two identical squares of paper, one for the base and one for the lid. We’ll make the base first, and the lid will follow the exact same process. I recommend using your coloured paper side facing up to start for both pieces.
Making the Box Base:
1. **Prepare your paper:** Place your square piece of paper in front of you with the coloured side facing up.
2. **First diagonal fold:** Take the bottom-right corner and fold it up to meet the top-left corner. Make a firm crease along the fold line. You should now have a triangle.
3. **Unfold:** Open the paper back up. You’ll see a diagonal crease running from the bottom-right to the top-left.
4. **Second diagonal fold:** Now, take the bottom-left corner and fold it up to meet the top-right corner. Crease firmly. You should have another triangle.
5. **Unfold:** Open the paper back up. You’ll now have two diagonal creases forming an ‘X’ across your square.
6. **First horizontal fold:** Turn the paper so it looks like a diamond, with the points facing you, top, right, bottom, and left. Take the bottom point and fold it up to meet the top point. Crease firmly.
7. **Unfold:** Open the paper back up. You’ll see a horizontal crease through the middle.
8. **First vertical fold:** Now, take the left point and fold it across to meet the right point. Crease firmly.
9. **Unfold:** Open the paper back up. You should now have two diagonal creases and two perpendicular creases, dividing your square into eight triangular sections meeting at the center.
10. **Bringing in the sides:** With the coloured side still facing up, take the right edge of the paper and fold it inwards so it meets the vertical center crease. Crease firmly.
11. **Repeat for the left side:** Take the left edge of the paper and fold it inwards to meet the vertical center crease. Crease firmly. Your paper now looks like a tall, narrow rectangle with two flaps on each side.
12. **Bringing down the top flap:** Take the top flap (the part that was originally the top section of your square) and fold it down so its top edge aligns with the horizontal center crease. Crease firmly.
13. **Repeat for the bottom flap:** Take the bottom flap and fold it up so its bottom edge aligns with the horizontal center crease. Crease firmly. Your paper now resembles a smaller square with four flaps at the top and four at the bottom.
14. **Forming the side walls:** Now, lift the top-left flap upwards. You’ll see a vertical crease line running up the middle of this flap. Fold the paper along this vertical crease line, bringing the outer edge of the flap to meet the center crease. This will start to form a side wall of your box.
15. **Repeat for all four corners:** Do the same for the top-right flap, the bottom-left flap, and the bottom-right flap. As you do this, the sides of your box will start to take shape.
16. **Securing the corners:** You’ll have four triangular flaps sticking out at the top and four at the bottom. Take one of the top triangular flaps and tuck its pointed tip *under* the flap directly next to it, on the same side of the box. This locks the side wall in place. You’ll need to do this for all four top flaps, tucking them into the flap next to them.
17. **Repeat for the bottom flaps:** Similarly, tuck the four bottom triangular flaps into the flap next to them, on the same side of the box. This will fully secure the base of your box.
18. **Open the box:** Gently open up the sides of the box. You should now have a lovely, sturdy origami box!
Making the Lid:
To make the lid, simply repeat all the steps above with your second square piece of paper. The lid will be slightly larger than the box because of how the folds are made, which is exactly what you want for a well-fitting lid.
Common Pitfalls and How to Avoid Them
Don’t worry if your first few attempts aren’t perfect. Origami takes a little practice, and there are a few common spots where beginners tend to stumble.
* **Imprecise Creases:** This is the most common issue. If your folds aren’t sharp and precise, the final box will be wobbly and the lid might not fit well.
* **How to avoid:** Always align edges and corners perfectly before creasing. Run your fingernail firmly along the entire length of each crease. Don’t be afraid to go over it a few times!
* **Uneven Folds for the Box Walls:** When you’re folding in the sides to create the box walls (steps 14-17), it’s easy for one side to be folded deeper or more shallow than another. This leads to an uneven box.
* **How to avoid:** Pay close attention to the vertical center crease you created earlier. Try to align the edge of the flap perfectly with that center line on all four sides. When tucking the corners, make sure the flaps are tucked in snugly and evenly.
* **Forgetting to Unfold:** In the early steps, we unfold after making diagonal and perpendicular creases. If you forget to unfold, you won’t have the necessary guidelines for the subsequent folds.
* **How to avoid:** Follow the instructions carefully and consciously unfold after steps 2, 4, 6, and 8. Visualizing the ‘X’ and plus sign creases helps confirm you’ve unfolded correctly.
Varying Your Origami Box: Get Creative!
Once you’ve mastered the basic box, the fun really begins with how you can customize it!
* **Size:** As mentioned, you can make boxes of different sizes by simply using larger or smaller squares of paper. Remember, you’ll need two squares of the same size for the box and its lid. Experiment with different dimensions to see what works for your needs.
* **Paper Pattern and Colour:** This is where you can let your personality shine!
* **Patterned paper:** Use paper with beautiful patterns for a decorative touch. Consider floral prints, geometric designs, or even wrapping paper that you’ve cut into squares.
* **Colour combinations:** Use contrasting colours for the box and lid for a bold statement, or choose complementary colours for a more harmonious look. You can even use paper that is a different colour on each side.
* **Texture:** Explore papers with different textures, like linen-finish paper or subtly embossed papers, for a more sophisticated feel.
* **Adding Embellishments:** After your box is folded, you can further decorate it by adding stickers, drawing on it, attaching ribbon, or even gluing on small embellishments like buttons or beads.
Displaying and Gifting Your Finished Model
Your beautiful handmade origami box is ready to be used or gifted!
* **For Display:**
* **Desk organization:** Use small boxes to store paperclips, erasers, USB drives, or other small stationery items on your desk.
* **Jewelry box:** A small, decorative box is perfect for holding rings, earrings, or other small pieces of jewelry.
* **Shelf décor:** Create a set of boxes in different sizes and colours to display on a shelf, adding a handmade artistic touch to your home.
* **For Gifting:**
* **Gift packaging:** Instead of a traditional gift bag or wrapping paper, present small gifts like chocolates, candies, or a special note inside your origami box.
* **Party favours:** Make a batch of these boxes and fill them with small treats for guests at a birthday party or other celebration.
* **Thank you gifts:** Fill a box with a small handmade item or some special treats as a thoughtful thank you gesture.
Congratulations on creating your first origami box! I hope you’ve enjoyed the process and are proud of your beautiful creation. This simple box is just the beginning of what you can make with paper and a little patience. Happy folding!
Conclusion
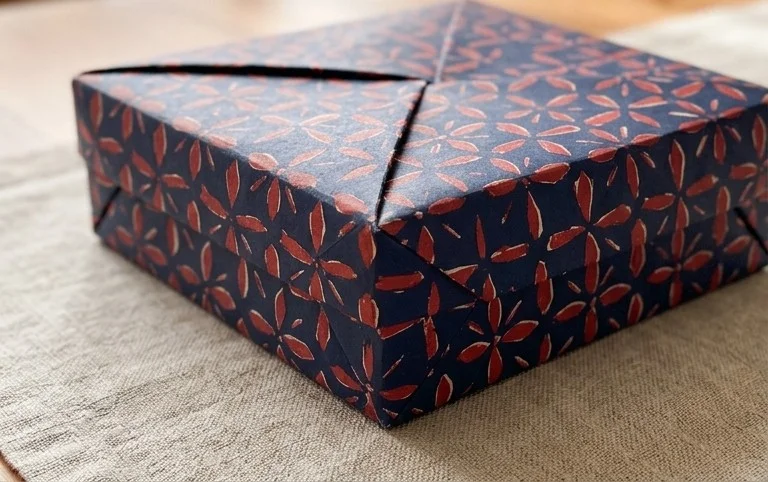
Congratulations on completing your very own easy and quick origami box with a lid! We hope you enjoyed this simple yet rewarding project. Don’t worry if your first attempt isn’t perfect; every fold is a step in your origami journey, and practice makes perfect. Once your beautiful box is ready, why not fill it with a small gift or some desk essentials and share your creation with a friend or family member? For your next origami adventure, try making a slightly larger box or perhaps a decorative envelope. There are so many wonderful paper projects waiting for you to discover, so keep exploring and folding!