Easy Origami Flower Bowl Tutorial – Paper Kawaii
Origami Flower Bowl Tutorial! Get ready to transform a simple square of paper into a delightful, blooming creation. Imagine a charming little bowl with delicate petals unfurling outwards, like a beautiful blossom ready to hold your treasures. This project is absolutely perfect for complete beginners, a fun activity for kids, or even a sweet handmade gift or decorative piece for your home. You’ll be amazed at how quickly you can fold this, likely within 15-20 minutes!
In this tutorial, we’ll guide you step-by-step through the easy folds and creases needed to bring this gorgeous origami flower bowl to life. You’ll learn essential origami techniques that are both fun and rewarding, creating something truly special with your own two hands. Let’s get folding and make something beautiful together!
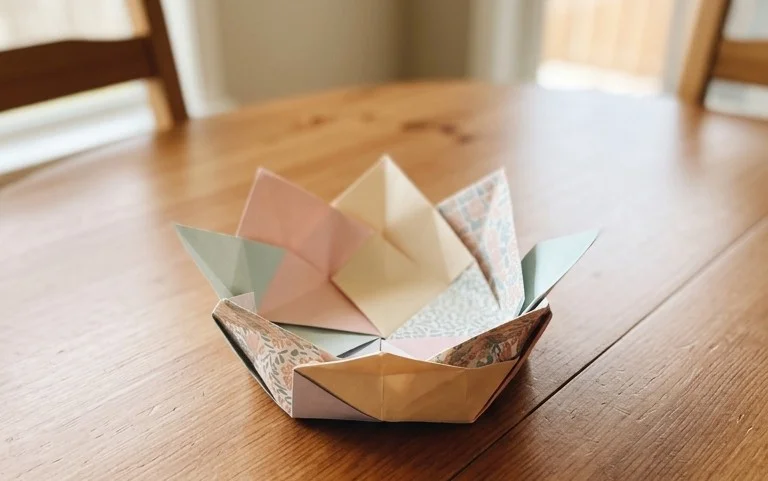
Origami Flower Bowl Tutorial – Paper Kawaii
Hello, lovely crafters! I’m so excited to guide you through making this absolutely adorable origami flower bowl. It’s a fantastic project for beginners, and the result is so charming you’ll want to make a whole bouquet of them. This little bowl is perfect for holding tiny treasures, a few sweets, or even just as a beautiful decorative piece. Let’s dive in and create some paper magic together!
Choosing Your Paper: The Foundation of Your Flower Bowl
The paper you choose is really important for how your flower bowl turns out. For this project, I recommend using standard origami paper.
* **Type:** Origami paper is ideal because it’s thin, strong, and holds creases beautifully. You can also use printer paper, but it’s a bit thicker and might make the final folds a little more challenging. Craft paper can also work, but again, be mindful of thickness.
* **Weight:** Standard origami paper is usually around 70-80 gsm (grams per square meter). This is perfect because it’s thin enough to allow for many layers of folds without becoming bulky, yet strong enough not to tear easily. Thicker paper will result in a sturdier bowl, but might be harder to fold precisely.
* **Size:** For a good-sized bowl that’s easy to handle, I recommend starting with a square piece of paper that is 15cm x 15cm (or 6 inches x 6 inches). This size is very common for origami paper packs and gives you enough space to practice the folds without feeling cramped.
* **Single or Double-Sided:** This is where you can get creative!
* **Single-Sided:** If you use single-sided origami paper (white on one side, coloured on the other), the outside of your bowl will be coloured, and the inside will be white. This creates a lovely contrast.
* **Double-Sided:** If you use double-sided origami paper (coloured on both sides), your bowl will be coloured on both the inside and the outside. This looks very cheerful!
* **Patterned Paper:** You can also use patterned paper. Just make sure the pattern isn’t too busy, as it might obscure the delicate folds of the flower. For a flower bowl, a subtle floral or polka dot pattern can be absolutely stunning.
The Base Folds: Getting Started on the Right Foot
Before we start building our flower bowl, we need to make a few important base folds. These are the building blocks of many origami models, and making them neatly now will make the rest of the process much smoother. We’ll be making a ‘Water Bomb Base’.
1. Start with your square piece of paper. If you’re using single-sided paper, place the coloured side facing down, so the white side is facing you.
2. Fold the paper in half diagonally to form a triangle. Bring one corner across to meet the opposite corner. Make a sharp crease along the edge you just created. Unfold the paper.
3. Now, fold the paper in half diagonally again, but this time bring the other two opposite corners together. Make another sharp crease. Unfold the paper. You should now have two diagonal crease lines forming an ‘X’ on your paper.
4. Flip your paper over so the coloured side is facing you (if you used single-sided paper).
5. Fold the paper in half horizontally, bringing the bottom edge up to meet the top edge. Make a good, firm crease. Unfold the paper.
6. Fold the paper in half vertically, bringing the left edge over to meet the right edge. Make another firm crease. Unfold the paper. You should now have a ‘+’ crease pattern on the coloured side and an ‘X’ on the white side.
Making the Water Bomb Base
Now, we’ll use those creases to form the Water Bomb Base.
1. Hold the paper with the coloured side up.
2. Gently push the left and right edges inwards. The creases you made should help the paper collapse.
3. As you push inwards, the top and bottom edges will start to come together. Bring the top edge down to meet the bottom edge.
4. You should end up with a triangle shape, with all the raw edges at the bottom. This is your Water Bomb Base! It’s like a flattened triangle with two flaps on each side at the bottom. Make sure your creases are nice and sharp.
The Fold Sequence: Building Your Flower Bowl
Now for the fun part – transforming that base into a beautiful flower bowl! Take your time, be gentle but firm with your creases, and enjoy the process.
1. Start with your Water Bomb Base, with the point (where all the corners meet) facing upwards, and the open edges at the bottom. The coloured side should be facing outwards.
2. Take the top layer of the right flap at the bottom and fold its bottom edge up to meet the top point of the triangle. Crease firmly.
3. Repeat step 2 with the top layer of the left flap at the bottom. Fold its bottom edge up to meet the top point. Crease firmly. You should now have a diamond shape on top of a triangle.
4. Flip the entire model over.
5. Repeat steps 2 and 3 on this side. Take the top layer of the right flap at the bottom and fold its bottom edge up to meet the top point. Crease firmly.
6. Then, take the top layer of the left flap at the bottom and fold its bottom edge up to meet the top point. Crease firmly. You should now have a diamond shape on both sides.
Now, we’re going to start forming the petals.
7. Take the top layer of the right flap of the diamond (the one that’s now on the right side of the diamond). You’ll see a small triangular point sticking out on the right. Fold this point inwards, towards the centre of the diamond, so that its edge aligns with the vertical centre line of the diamond. Crease firmly.
8. Repeat step 7 with the top layer of the left flap of the diamond. Fold its small triangular point inwards, towards the centre, so its edge aligns with the vertical centre line. Crease firmly. You should now have two flaps folded inwards, meeting in the middle.
9. Flip the model over.
10. Repeat steps 7 and 8 on this side. Take the top layer of the right flap and fold its small triangular point inwards to the centre line. Crease firmly.
11. Take the top layer of the left flap and fold its small triangular point inwards to the centre line. Crease firmly. You should now have the diamond shape on both sides with these inward folds.
This is where the flower shape starts to emerge.
12. Look at the very tip of the diamond shape. You’ll see there are two layers of paper. Gently separate these two layers on the right side.
13. Carefully tuck the small triangular point you just folded inwards in step 7 *inside* the pocket formed by separating these two layers. You want to slide this point all the way down into the pocket, so it’s secured. This is what forms the petal’s structure. Crease gently to flatten.
14. Repeat step 13 on the left side. Gently separate the two layers of paper at the tip of the diamond.
15. Tuck the small triangular point you folded inwards in step 8 *inside* this pocket. Slide it down and crease gently.
16. Flip the model over.
17. Repeat steps 13 and 14 on this side. Separate the layers on the right side and tuck the point inside.
18. Separate the layers on the left side and tuck the point inside.
You’re almost there! You should now have something that looks like a four-pointed star or a slightly flattened flower bud.
19. Now, we need to open up the bowl. Look at the bottom of the model. You should see four little pockets where the flaps were originally.
20. Gently insert your finger into one of these pockets.
21. Carefully pull outwards and downwards. As you pull, the paper will begin to open up, revealing the inside of your bowl.
22. Repeat step 21 for the other three pockets, gently encouraging the bowl to open and take shape. Be patient! Sometimes it takes a gentle wiggle.
23. Once opened, gently flatten the base of the bowl to help it stand upright. You can also gently shape the petals by cupping them slightly with your fingers.
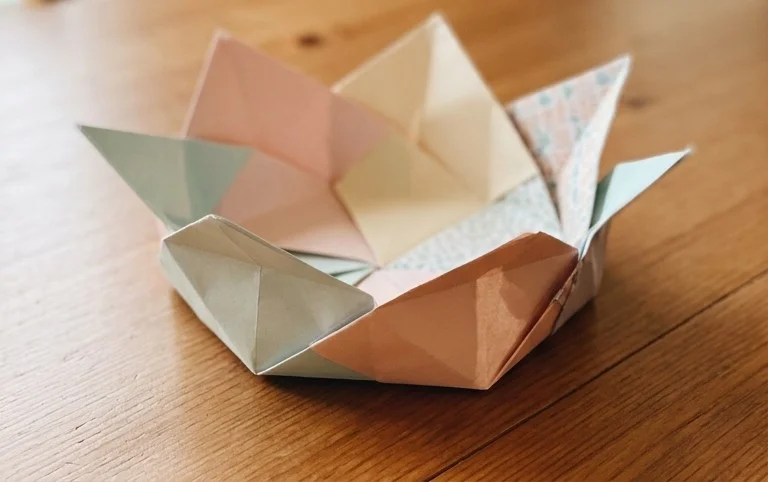
Congratulations! You’ve made your very own origami flower bowl!
Common Beginner Pitfalls and How to Avoid Them
Even the most experienced folders can make mistakes, so don’t worry if your first attempt isn’t perfect. Here are a couple of places beginners often get stuck and how to navigate them:
* **Creases Aren’t Sharp Enough:** This is probably the most common issue. Origami relies on precise creases to hold its shape.
* **How to Avoid:** After each fold, run your fingernail along the crease line firmly. For thicker paper, you might need to press down a bit harder. Imagine you’re trying to ‘score’ the paper. Doing this consistently from the very first folds will make a huge difference.
* **Misunderstanding the ‘Water Bomb Base’ Collapse:** The initial collapse into the Water Bomb Base can feel a bit counter-intuitive.
* **How to Avoid:** Really look at the creases you made in the initial steps. The diagonal creases (the ‘X’) should be mountain folds (ridges sticking up), and the horizontal/vertical creases (the ‘+’) should be valley folds (dips going inwards) when you start to collapse it. When you gently push the sides inwards, these creases naturally guide the paper to fold upon itself. Imagine the centre of the paper sinking downwards as the sides come together.
* **Tucking the Petals Incorrectly:** Steps 13-18, where you tuck the points into the pockets, can be fiddly. If you don’t tuck them properly, the petals won’t hold their shape or the bowl might not open well.
* **How to Avoid:** Take your time with these steps. Make sure you are separating the *two layers* of paper at the tip. Gently guide the point all the way down into the pocket. You’re essentially locking the petal in place. If it feels resistant, gently adjust the layers and try again. Don’t force it, as you could tear the paper.
Varying Your Flower Bowl: Make it Uniquely Yours!
The beauty of origami is its versatility! Once you’ve mastered the basic folds, you can play around and create endless variations.
* **Size:** This is the easiest variation! Simply start with a larger or smaller square piece of paper. If you use an A4 sheet (which is rectangular), you can make it square by folding one corner down to the opposite edge and cutting off the excess strip. A larger piece of paper will result in a larger bowl, and a smaller piece will make a miniature one.
* **Paper Pattern and Colour:** Experimentation here is key!
* **Colour Combinations:** Use paper that is coloured on both sides but in different colours. The inside and outside of your bowl will have a fun, contrasting look.
* **Pattern Placement:** If you use single-sided patterned paper, think about which side you want facing out for the base and which you want showing on the petals. For example, a solid colour for the base and a patterned side for the petals can look very striking.
* **Metallic or Textured Paper:** For a more sophisticated look, try metallic origami paper or paper with a subtle texture.
* **Adding Embellishments:** Once your bowl is finished, you can add a touch of sparkle! A tiny dot of glue and some glitter on the tips of the petals, or a small bead glued to the centre, can make it even more special.
Displaying and Gifting Your Flower Bowl
These little flower bowls are so delightful, they deserve to be shown off!
* **For Display:**
* **Desk Companion:** Place it on your desk to hold paperclips, erasers, or small coins.
* **Shelf Decor:** Arrange a few in different colours and sizes on a shelf for a vibrant display.
* **Catch-All Dish:** Use it on an entryway table for keys or loose change.
* **Centrepiece:** A larger bowl can be a charming centrepiece for a small table.
* **For Gifting:**
* **Sweet Treat Holder:** Fill it with a few chocolates or candies for a lovely edible gift.
* **Jewellery Holder:** Perfect for gifting to a friend to hold a small necklace or earrings.
* **Party Favours:** Make a batch for a special occasion like a birthday or baby shower.
* **Handmade Card Embellishment:** Glue one to the front of a handmade card for a unique 3D element.
* **Care Package Addition:** A small, cheerful origami bowl is a wonderful addition to a care package.
I hope you’ve enjoyed this tutorial and are feeling inspired to create many beautiful flower bowls! Remember, practice makes perfect, and the most important ingredient is having fun. Happy folding!
Conclusion
Congratulations on completing your origami flower bowl! We hope you enjoyed this delightful paper crafting journey. Don’t be discouraged if your first attempt isn’t perfect; every fold is a step towards mastery, and practice truly makes perfect. We’d be thrilled to see your beautiful creations! Feel free to share your finished flower bowl with friends and family. For your next adventure, why not try making a larger version or experimenting with different coloured papers to create a vibrant display? And remember, there are always more exciting paper projects waiting for you to discover on Paper Kawaii!
