Easy Origami Hyacinth Flowers: Step-by-Step Guide
How to Make Paper Hyacinth Flowers will bring a burst of springtime charm to your crafting space! Imagine delicate, layered petals spiraling upwards, creating a sweet, ruffled blossom that looks so realistic you’ll want to sniff it. This project is absolutely perfect for complete beginners, and kids will love folding their own vibrant bouquets. They make wonderful, handmade gifts or beautiful decorations for your home, and each flower takes just about 5-10 minutes to complete, depending on your speed. In this tutorial, we’ll guide you step-by-step through simple folds and manipulations to achieve these lovely paper blooms. Get ready to transform a simple square of paper into something truly special!
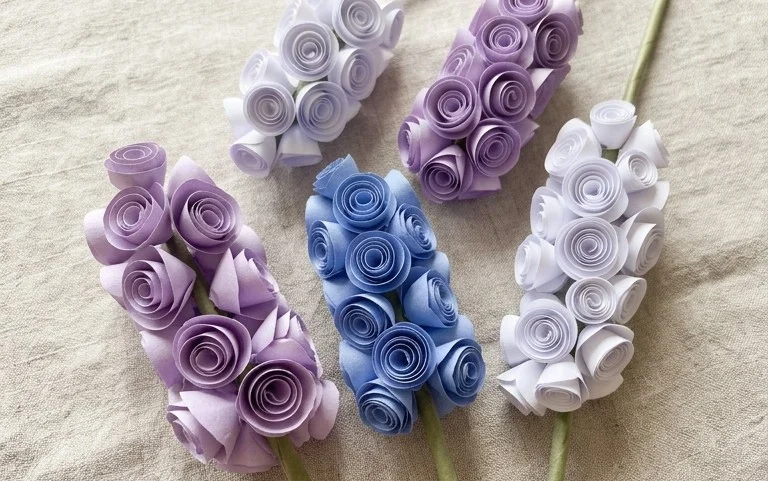
Here’s a detailed origami tutorial for making paper hyacinth flowers, written for beginners.
Making Beautiful Origami Hyacinth Flowers
Hello fellow paper enthusiasts! Today, we’re going to embark on a delightful origami journey to create some charming paper hyacinth flowers. These delicate blooms are surprisingly simple to make once you understand the basic folds, and they bring a lovely splash of colour to any space. I remember my first attempts at origami flowers were a bit wobbly, but with a little patience and careful folding, you’ll be creating a whole bouquet in no time!
Choosing Your Paper: The Foundation of Your Hyacinth
The type of paper you choose can really make your origami hyacinth stand out. For this project, I highly recommend using origami paper.
* Type: Traditional origami paper is usually made of kozo or mitsumata fibers, which gives it a lovely texture and strength. However, standard origami paper you find in craft stores, often with a coloured side and a white side, works perfectly well.
* Weight: Aim for paper that’s around 70-90 gsm (grams per square meter). This weight is thin enough for clean folds but sturdy enough to hold its shape. Anything too thick will be difficult to fold accurately, and anything too thin might tear.
* Size: For a good-sized hyacinth, a 6-inch (approximately 15 cm) square is ideal. This size allows for manageable folds and a satisfying final bloom. You can certainly experiment with smaller or larger squares once you’re comfortable.
* Single or Double Sided: For the hyacinth, I prefer to use single-sided coloured paper. This way, the inside of the petals can be white, giving a subtle depth and realism. If you have double-sided paper, it will still look beautiful, just with both sides of the colour showing.
Mastering the Base Folds: Your Origami Toolkit
Before we start the hyacinth itself, let’s get comfortable with a couple of fundamental folds that are crucial for many origami models, including this one.
The “Valley Fold”: This is perhaps the most common fold. Imagine you’re folding a piece of paper in half so that the crease forms a “valley.” You bring one edge or corner to meet another edge or corner, and then firmly press down along the line where they meet to create a sharp crease.
The “Mountain Fold”: This is the opposite of a valley fold. Imagine you’re folding a piece of paper so the crease forms a “mountain” ridge sticking up. To make a mountain fold, you usually fold the paper away from you along a pre-existing crease. We’ll often make a valley fold first, then unfold, and then reverse that crease to make it a mountain fold.
Making Clean Folds: The secret to beautiful origami lies in crisp, precise folds.
* Align your edges and corners meticulously before making a crease. Even a millimeter’s difference can affect later steps.
* Use your fingernail or a bone folder (if you have one) to really press down along the fold line. This makes the crease sharp and helps the paper lie flat.
* Practice! The more you fold, the more natural these precise movements will become.
The Fold Sequence: Bringing Your Hyacinth to Life
Let’s begin! We’ll start with our coloured side up if you’re using single-sided paper.
1. Begin with your 6-inch square of paper, coloured side up.
2. Fold the paper in half diagonally by bringing the bottom right corner up to meet the top left corner. Crease firmly, then unfold.
3. Now, fold the paper in half diagonally the other way, bringing the bottom left corner up to meet the top right corner. Crease firmly, then unfold. You should now have an “X” shaped crease on your paper.
4. Flip the paper over so the white side is facing up.
5. Fold the paper in half horizontally by bringing the bottom edge up to meet the top edge. Crease firmly, then unfold.
6. Fold the paper in half vertically by bringing the left edge over to meet the right edge. Crease firmly, then unfold. You should now have a “+” shaped crease on this side, and the “X” creases from before should appear as “mountains” when viewed from this side.
7. Now, we’re going to collapse the paper into a “preliminary base” or “square base.” Gently push the left and right sides of the paper inwards towards the center, along the horizontal crease you just made. As you do this, the top flap will naturally start to come down. Guide the top point downwards so it meets the bottom point. The sides will fold in along the diagonal creases. Flatten the paper into a square. The open edges should be at the bottom.
8. With the open edges of the square base pointing towards you, take the top layer of the right flap. Fold its bottom edge inwards so it aligns with the center vertical crease. Crease firmly.
9. Repeat step 8 with the top layer of the left flap, folding its bottom edge inwards to align with the center vertical crease. Crease firmly. You should now have a kite shape on this side.
10. Flip the entire model over.
11. Repeat steps 8 and 9 on this side. Fold the bottom edge of the right flap inwards to meet the center crease, and then do the same for the left flap. You will now have a kite shape on both sides.
12. Now, we’re going to create the petals. Look at the right flap of the kite shape. Fold the very tip of this flap downwards, so it aligns with the point where the two folded edges meet at the bottom. Crease firmly.
13. Repeat step 12 with the left flap. Fold its tip down to align with the bottom point. Crease firmly.
14. Flip the model over.
15. Repeat steps 12 and 13 on this side. Fold the tip of the right flap down, and then the tip of the left flap down.
16. Now, we need to create the “petal folds.” Take the right flap of the kite shape. You’ll see a diagonal crease running down from the top point. We’re going to fold this flap outwards and upwards along this crease, but first, we need to open up the flap slightly. Gently lift the rightmost edge of the flap away from the center.
17. Look at the existing creases on the right flap. You’re going to “reverse fold” this flap upwards. Essentially, you’re opening the flap and then folding it outwards and upwards along the diagonal crease you can see. Imagine you are opening up the flap and then tucking the folded part underneath itself, so it forms an outer petal. The top point of the flap will become the tip of a petal. Aim to make this fold so the edge of the petal lines up nicely with the edge of the opposite side. Crease firmly.
18. Repeat step 17 on the left flap to create the second petal on this side.
19. Flip the model over.
20. Repeat steps 17 and 18 on this side to create the remaining two petals. You should now have a shape with four distinct points, which are your hyacinth petals.
21. To open up the flower, gently pull the four petal points outwards. You can also gently puff out the center by lightly pressing in on the base of the flower.
Common Beginner Pitfalls and How to Avoid Them
Don’t worry if your first few hyacinths aren’t perfect. We all start somewhere! Here are a couple of common places beginners can stumble and how to avoid them:
* Misaligning Edges in the Square Base: When making the square base (step 7), if your initial horizontal and vertical folds aren’t perfectly aligned, the square base won’t collapse neatly.
* How to Avoid: Go back to steps 5 and 6. Ensure you’re bringing the edges together precisely before creasing. Take your time and use your fingernail to keep the edges aligned as you fold. A well-creased “+” shape makes collapsing into the square base much easier.
* Messy Petal Folds (Reverse Folds): Step 17, the reverse fold for the petals, can be tricky. If you don’t unfold a little or if your initial creases aren’t clear, the petal can look messy or the fold won’t lie flat.
* How to Avoid: Before attempting the reverse fold, make sure your diagonal creases from step 12-15 are very sharp. When you’re ready for the reverse fold, gently open up the flap just enough to get your finger inside. Then, carefully guide the flap upwards along the existing crease, making sure the new fold is clean. Think of it as “unzipping” the fold outwards. Don’t be afraid to gently unfold and refold a few times to get the petal looking right.
Varying Your Hyacinth Creations
Once you’ve mastered the basic hyacinth, the fun really begins with variations!
* Size: As mentioned, you can use different sized squares of paper. Smaller squares will create miniature hyacinths, perfect for embellishing cards or gift tags. Larger squares will result in more prominent flowers, great for standalone decorations.
* Paper Pattern: Don’t be limited to solid colours!
* Chiyogami or Washi Paper: These beautiful papers often have intricate patterns and metallic accents, which can make your hyacinths look incredibly sophisticated.
* Scrapbook Paper: Look for papers with floral motifs, subtle textures, or even geometric designs. Just ensure the weight isn’t too heavy.
* Newspaper or Book Pages: For a vintage or deconstructed look, try using old newspaper clippings or pages from vintage books. These can add a unique character to your blooms.
* Colour: The possibilities are endless!
* Pastels: Soft pinks, lavenders, blues, and greens create a gentle, springtime feel.
* Vibrant Hues: Bright oranges, yellows, and reds can make for bold and cheerful flowers.
* Ombre or Gradient Paper: If you can find paper that fades from one colour to another, it can add a beautiful subtle effect to the petals.
Displaying and Gifting Your Origami Hyacinths
Finished hyacinths are wonderful for so many occasions!
* Bouquets: Make several hyacinths in coordinating colours and arrange them in a small vase for a charming table centrepiece. You can even add real or paper stems.
* Garlands: String them together to create beautiful origami garlands for parties or to decorate a room.
* Gift Toppers: Attach a single hyacinth to a gift box or a bouquet of real flowers for a special handmade touch.
* Card Embellishments: Glue them onto handmade cards to add a touch of elegance and artistry.
* Mobiles: Create a mobile by hanging several hyacinths at different lengths from a hoop or branch.
* Party Favors: Make a small hyacinth for each guest at a party or shower.
I hope you enjoy making your paper hyacinths! It’s a rewarding process that brings a little bit of folded magic into the world. Happy folding!
Conclusion
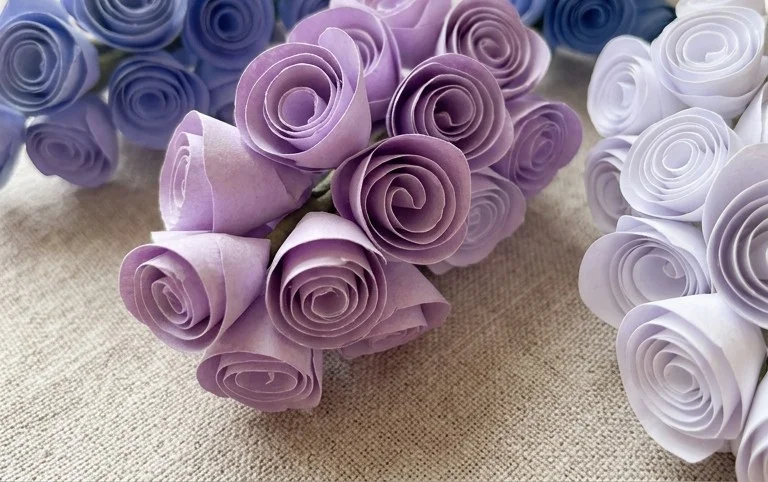
Congratulations on creating your beautiful origami paper hyacinth flowers! We hope you enjoyed this tutorial and are proud of your delicate blooms. Don’t worry if your first paper hyacinth isn’t perfect; every fold is a step towards mastery. The beauty of origami is in the process and the joy of creation.
We encourage you to share your lovely paper hyacinth flowers with friends and family. For your next crafting adventure, why not try making a smaller version by using square paper cut in half, or perhaps experimenting with different textured papers for added depth? There are so many wonderful paper projects waiting for you to discover. Keep folding and exploring the endless possibilities of paper art!
