Easy Origami Owl: Step-by-Step Paper Craft
Origami Owl: Step-by-Step Instructions! Get ready to transform a simple piece of paper into a charming, three-dimensional owl that looks like it’s ready to hoot from your bookshelf or desk. This delightful project is perfect for complete beginners and kids alike, making it a fantastic activity for a rainy afternoon or a thoughtful handmade gift. You’ll be amazed at how quickly it comes together – usually in under 15 minutes! I’ll guide you through each fold, showing you how to create the distinctive owl shape, those adorable ear tufts, and its sweet little beak. We’ll focus on clear, simple steps, so you’ll gain confidence with basic folding techniques while creating something truly special. Let’s get folding!
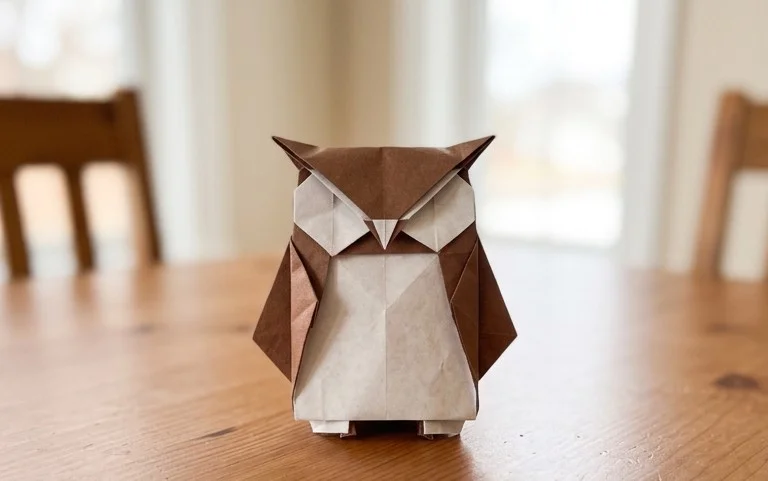
Origami Owl: Step-by-Step Instructions
Hello there! Welcome to my tutorial on how to fold a charming origami owl. Origami can seem a little daunting at first, but I promise, with a little patience and clear instructions, you’ll be creating these delightful creatures in no time. This owl is a fantastic project for beginners, and once you’ve mastered it, you’ll find it incredibly rewarding. Let’s get started on folding our very own wise old owl!
Choosing Your Paper
The first step in any origami project is selecting the right paper. For this owl, you have a few excellent choices.
Type of Paper
For this owl, I highly recommend using standard origami paper. This paper is specifically designed for folding – it’s thin enough to allow for crisp creases and multiple layers, yet strong enough to hold its shape without tearing easily. It’s also usually square, which is a great help when you’re starting out.
If you don’t have dedicated origami paper, you can certainly use other types. Plain printer paper can work, but it can be a bit thicker, making it harder to get sharp folds, especially when you get to the later stages with many layers. If you do use printer paper, make sure to cut it into a perfect square. Cardstock is generally too thick for this model and will make it difficult to fold accurately.
Weight of Paper
Origami paper typically comes in weights around 60-80 gsm (grams per square meter). This is the ideal weight for our owl. It’s light enough for clean folds but substantial enough to give the finished owl some structure.
Size of Paper
For your first owl, I suggest starting with a medium-sized square, perhaps 6 inches by 6 inches (or about 15 cm by 15 cm). This size is comfortable to hold and manipulate, and the details of the owl will be clear. Once you’re more confident, you can experiment with smaller or larger sizes.
Single or Double-Sided Paper
This is where you can have some fun with the appearance of your owl!
* Single-sided origami paper has one colored side and one white side. When you fold this owl, the white side will show on the inside of certain parts, like the wings. This can create a lovely contrast.
* Double-sided origami paper has the same color on both sides. This will give your owl a uniform color throughout.
* You can also use paper with a pattern on one side and a solid color on the other, or even patterned paper on both sides. This can lead to some very unique and beautiful owls. For this tutorial, I’ll assume you’re using single-sided paper, and I’ll point out where the white side might appear.
Essential Base Folds
Before we dive into the owl itself, let’s get familiar with a couple of fundamental folds that we’ll use repeatedly. Making these cleanly will set you up for success.
The Valley Fold
A valley fold is the most basic fold. Imagine you’re making a valley in the paper. You bring one edge or corner to meet another edge or corner, and then crease along the line where they meet. When you unfold, the crease will look like a valley.
To make a clean valley fold:
1. Align the edges or corners you want to bring together precisely. Take your time with this.
2. Once aligned, gently press down with your finger along the edge of the fold.
3. For a really crisp crease, you can use your fingernail or a bone folder (if you have one) to firmly run along the fold line.
The Mountain Fold
A mountain fold is the opposite of a valley fold. Instead of the crease appearing as a valley, it looks like a mountain peak when unfolded. To create a mountain fold, you first make a valley fold, and then you unfold the paper. Then, you push the crease inwards, so the fold goes away from you.
To make a clean mountain fold:
1. First, make a valley fold as described above, creasing it firmly.
2. Unfold the paper completely.
3. Now, gently push along the crease line you just made, but this time, in the opposite direction of the valley fold. The crease should now pop up, looking like a mountain ridge.
The Square Base (or Preliminary Base)
This is a very common base in origami and we’ll need it for our owl.
1. Start with your square piece of paper, colored side up (if it has one).
2. Fold the paper in half diagonally, bringing the bottom right corner up to meet the top left corner. Crease well. Unfold.
3. Now, fold the paper in half diagonally again, this time bringing the bottom left corner up to meet the top right corner. Crease well. Unfold. You should now have two diagonal creases forming an ‘X’ on your paper.
4. Turn the paper over so the white side is facing up.
5. Fold the paper in half horizontally, bringing the bottom edge up to meet the top edge. Crease well. Unfold.
6. Fold the paper in half vertically, bringing the left edge over to meet the right edge. Crease well. Unfold. You should now have creases dividing your paper into four quadrants.
7. Now, hold the paper with the horizontal and vertical creases making a ‘+’ shape. Gently push the left and right sides of the paper inwards along the vertical crease. As you do this, the top and bottom edges will naturally want to come together. Use the diagonal creases to help guide the paper.
8. Flatten the paper down into a smaller square. This is your Square Base. You should have four flaps meeting at the bottom point.
Folding Your Origami Owl: A Numbered Walkthrough
Alright, let’s begin folding our owl! Remember to be patient and make each crease as neat as possible.
1. Start with your Square Base. Make sure the open end (the end with the four flaps) is pointing towards you. The closed point should be at the top.
2. Take the top layer of the right flap. Bring its bottom edge to meet the center vertical crease. Crease firmly.
3. Repeat step 2 with the top layer of the left flap. Bring its bottom edge to meet the center vertical crease. Crease firmly. Your paper should now look like a kite shape on top of a square.
4. Now, fold the top triangular point of the paper down, so it aligns with the top of the two flaps you just folded. Crease well. This fold will secure the kite shape.
5. Unfold the last three folds you made (steps 2, 3, and 4). You should have creases marking where you folded.
6. Now, we’re going to perform a petal fold. This might be the trickiest part for beginners, so take your time. Lift the bottom point of the top layer of paper up. As you lift it, use the creases you made in steps 2 and 3 to bring the sides inwards. The point should lift all the way up, and the sides should fold in along the creases. Flatten everything down. This is called a petal fold. You should have a diamond shape on top of the remaining layers.
7. Turn the entire model over.
8. Repeat steps 2 through 6 on this side. So, fold the bottom edge of the right flap to the center crease, then the bottom edge of the left flap to the center crease. Fold the top point down. Unfold these three folds. Then, perform the petal fold by lifting the bottom point up and bringing the sides inwards along the creases, flattening it down into a diamond.
9. You should now have a shape that looks like two diamonds stacked on top of each other, with the points at the top and bottom.
10. Take the right flap of the top diamond. Fold its outer edge to meet the center vertical crease. Crease firmly.
11. Repeat step 10 with the left flap of the top diamond. Fold its outer edge to meet the center vertical crease. Crease firmly.
12. Now, flip the entire model over.
13. Repeat steps 10 and 11 on this side. Fold the outer edge of the right flap to the center, and then the outer edge of the left flap to the center.
14. You should now have a long, thin diamond shape. Look at the bottom point of this shape. This will become the owl’s tail. Fold this bottom point upwards, about a third of the way up the model. Crease firmly.
15. Now, we’ll shape the owl’s head and body. Take the top point of the model. You are going to fold it down, but not all the way. You want to create a rounded effect. Fold the tip down about an inch or so (or about 2-3 cm), and then fold that folded section back up a little bit, creating a small fold that gives the head a rounded shape. This is like creating a small pleat at the top. Experiment to get the look you like.
16. Now, let’s give our owl some eyes! Look at the front of your owl, where the head is. You’ll see two flaps that will become the wings. Between these flaps, at the top, there’s a point that will be the owl’s face. About halfway down the face, you’ll want to make a small inward fold on each side to suggest the owl’s eyes. To do this, gently pinch the paper on either side of the center and push inwards slightly, creating a small indentation or pleat. Don’t make it too deep, just a subtle suggestion of eyes.
17. To give your owl some dimension, you can gently pull the wings apart slightly. The paper will naturally want to bend, giving the owl a more three-dimensional appearance.
And there you have it! Your very own origami owl is complete. Congratulations!
Common Beginner Pitfalls and How to Avoid Them
It’s completely normal to encounter a few hiccups when you’re learning origami. Here are some common mistakes beginners make with this owl and how to prevent them:
Not Making Crisp Creases
* The Problem: If your creases aren’t sharp, the paper will be floppy, and the model won’t hold its shape well. This can make later folds inaccurate and the finished owl look messy.
* How to Avoid It: Be deliberate with your creasing. After aligning edges and corners, don’t just lightly run your finger. Use your fingernail or even the edge of a ruler to make firm, sharp creases. On the Square Base and the petal folds, especially, good creases are crucial.
Misinterpreting the Petal Fold
* The Problem: The petal fold (step 6 and 8) can be confusing. People sometimes try to force the paper or fold in the wrong direction, resulting in an uneven or misshapen diamond.
* How to Avoid It: Trust the creases you’ve already made. When you lift the bottom point, the existing creases are your guide. Gently coax the sides inwards along those lines. It’s like the paper is being encouraged to fold along the lines you’ve already established. Watch the diagonals and the horizontal/vertical creases you made earlier – they dictate how the paper should move.
Folding Too Quickly
* The Problem: Rushing through the steps leads to misaligned folds and missed details, making the final model look off.
* How to Avoid It: Slow down! Origami is a mindful activity. Take your time with each step, especially the alignment of corners and edges. If a step feels confusing, reread the instruction and look at the paper. It’s better to take an extra minute per step and get it right than to rush and have to start over.
Not Paying Attention to Which Side is Up
* The Problem: Some steps require you to flip the paper or work with a specific side facing you. Not doing this can lead to the wrong layers being folded or an inverted model.
* How to Avoid It: Always read the instructions carefully regarding flipping the paper or which side should be facing up. If you’re using single-sided paper, pay attention to whether you want the colored side or the white side to be visible in a particular section.
Varying Your Origami Owl
Once you’ve mastered the basic owl, you can have a lot of fun customizing it!
Size
* As mentioned earlier, the size of your paper directly dictates the size of your owl. Try folding with smaller squares for miniature owls, perfect for decorating cards, or larger squares for a more substantial display piece. Remember that with smaller paper, your folds will need to be even more precise.
Paper Pattern
* The possibilities here are endless!
* **Patterned Origami Paper:** Many origami papers come with beautiful traditional Japanese patterns, floral designs, or geometric prints. These will add unique character to your owl.
* **Washi Tape:** You can adhere washi tape to plain paper before folding to create custom patterns and stripes.
* **Stamps or Drawings:** Before folding, you could stamp or draw on your paper to create your own designs.
* **Magazine Pages/Newspaper:** For an eco-friendly and quirky owl, try using interesting pages from magazines or newspapers. The text and images can create a really interesting texture.
Color
* Beyond using single or double-sided colored paper, consider:
* **Gradient Paper:** Paper that fades from one color to another will give your owl a beautiful ombré effect.
* **Metallic Paper:** For a touch of elegance, metallic origami paper is stunning.
* **Textured Paper:** Papers with a subtle texture can add another dimension to your owl.
Ideas for Displaying or Gifting Your Finished Owl
These little owls make wonderful decorations and thoughtful gifts.
Display Ideas
* **Desk Buddy:** Place your owl on your desk to keep you company while you work or study.
* **Shelf Decor:** Arrange a few owls of different sizes and colors on a bookshelf or mantelpiece.
* **Mobile:** String several owls together with thread or fishing line to create a charming mobile.
* **Part of a Larger Scene:** Use your owl as a character in a diorama or a miniature landscape.
* **Garland:** Punch a small hole through the top and thread them onto a string to make a festive garland.
Gifting Ideas
* **Bookmark:** Attach a ribbon or a tassel to the tail of your owl, and it makes a lovely, handmade bookmark.
* **Gift Topper:** Instead of a traditional bow, attach an origami owl to the top of a wrapped gift.
* **Card Embellishment:** Glue a small owl onto a handmade card for a special touch.
* **Party Favors:** Make a batch of owls for a woodland-themed party and use them as unique favors for your guests.
* **”Thinking of You” Gift:** Sometimes, a small, handmade token is the most meaningful gift. An origami owl is perfect for that.
I hope you’ve enjoyed folding this origami owl with me. Remember, practice makes perfect, and every owl you fold will be a little bit better than the last. Happy folding!
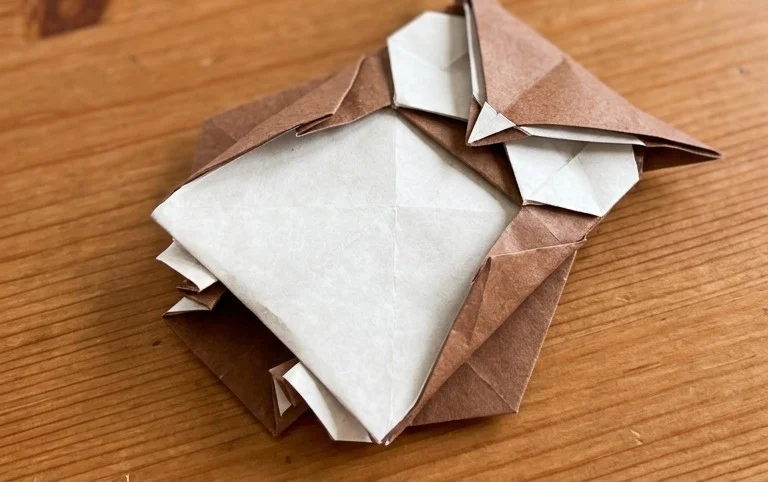
Conclusion
Congratulations on completing your origami owl! We hope you enjoyed this step-by-step tutorial. Don’t worry if your first origami owl isn’t perfect; every fold is a learning experience! The beauty of papercraft is the joy of creation. We encourage you to try this origami owl again, perhaps improving on your previous attempt. Feel free to share your wonderful creations with friends and family – they’ll surely be impressed!
Ready for more paper adventures? Next, try folding a classic origami crane or perhaps a charming origami butterfly. The possibilities are endless! We invite you to continue exploring the magical world of paper projects and discover even more fascinating models to fold.
